My awesome friend Emily posted her menu for the week recently. I've been meaning to do the same because some of these recipes are AWESOME and I would love to share them! I don't have pretty pictures this time, because I don't know know how to give proper credit to the source, so I'll just list menu items and links here. I should note, I only plan 3 meals per week and I don't always plan them when I'm going on a business trip. But, here is what we have going on in February:
Baked Pasta and Broccoli with *chicken* and Cauliflower Cream Sauce.
http://www.ourbestbites.com/2012/01/baked-pasta-and-broccoli-with-ham-and-cheesy-creamy-cauliflower-sauce/ Notes: Not for the faint of heart. Took a good 45 minutes to prepare. But..4 adults devoured the entire bowl (almost). Added: Red Peppers, small whole mushrooms (sauteed.)
Italian Potato Sausage Soup -- Tasty! We used a mild sausage and the soup still had tons of flavor. I would half the recipe for just us next time...this recipe makes a ton.
http://www.ourbestbites.com/2012/01/italian-potato-sausage-soup/
Buttermilk Roast Chicken - This recipe is DIVINE and SO EASY. As in, the 2 hardest parts are remembering to buy buttermilk and throwing it together the night before for at least 24 hours of soaking. I love chicken, especially dark meat, and this was a huge favorite.
http://smittenkitchen.com/2012/01/buttermilk-roast-chicken/
Not as many recipes for what else is on the menu:
Lasagna
Salmon (Pesto style or parchment paper)
Tomato Soup
Fajitas (I made them with taco seasoning...not my favorite fajita ever)
Mini Pizzas
We don't always eat exactly what we plan, but I at least know that I have some menu options. Any ideas for new recipes?
Wednesday, February 22, 2012
Friday, January 20, 2012
For posting to Pinterest
I have recently discovered the time-drain that is Pinterest. I can't really say I'm "TOO" addicted (yet) since I think the searching feature is kind of lacking and I'm not too into random browsing. I still prefer to find other addicting crafting sites via "linky parties" from a few of my favorite bloggers.
But recently my sister in law (seriously crafty and talented) made us this wreath for Christmas. I texted a picture to my sister for evaluation (of how it looked on the door. I already knew it was awesome). She immediately exclaimed it was amazing and looked like it should be on Pinterest. So here I am blogging about it just so I can pin it. Wild, I know.

Anyhow. Toodles.
Tuesday, January 3, 2012
Happy Engagement Strawberries
So, "surprise" engagement parties see to be all the rage these days. Not that I don't love knowing all kinds of secrets before the fiancee-to-be folk. So at a recent party, I was assigned a fruit tray to bring. The host suggested strawberries and I couldn't resist converting a few into chocolatey delights.
Here are my bride and groom strawberries. The "sweetheart" line on the "bride" was an accident, but it totally worked.

A few more for the other party goers to chomp on...left the rest un-sugared and barely ripe...it is January!


Thursday, December 22, 2011
Last Christmas present, done! (Now to wrap)
I'm finally done with my last Christmas gift. This one is for my 4 year old niece, Bailey. I love my nephews but since marrying Zach I can finally buy (make) girly stuff!!! I was inspired to make this from a recycled pringles can post, which I thought I favorited, but can't find now. Its really almost nothing like the original tutorial, so whatevs. Here goes:
This is the final product. A 3 tier, rotating tree house/treasure trove/etc tower.


The pringles re-make list had you 1) slicing the can into sections and adding your own bottom to each section, 2) using a dowel in the base and then gluing a straw to the outside of each section and stacking each piece by running the straw through the dowel. I thought my method was more sturdy.
Likey? Think Bailey will like? Wish you had your own (maybe with a better color scheme?! haha)
Monday, December 19, 2011
Christmas Mantle!
Due to a trip to Scotland (where I nearly got snowed in) I had a late start on my Christmas decorating this year.
 Unpacking our boxes I realized I have a lot of snowmen things...I mean a lot! Don't get me wrong, I love snowmen (and they conveniently provide decoration through at least February!) but I think I'm going to start looking for more nativity themed decor.
Remember my cheap-o Target star and spray painting project? Love it. Oh, and those 2 ceramic snowmen are salt and pepper shakers some gals and I painted at my bachelorette party.
 More clearance snowmen from last year...and my "D" letter has gotten a remodel...love spray paint!
 Lastly, the wedding centerpieces I never had...Not that I didn't like mine, but I did like the look of cranberries floating in water. Not that this picture and lighting does it any justice, thats for sure. These are sitting on a $.50 floor tile from Home Depot that I spray painted (and a little cork board under that to protect my table.) Loving the floor tile "coaster" and will have to work that into more things in the future. I think I can use it as a trivet, even...maybe?

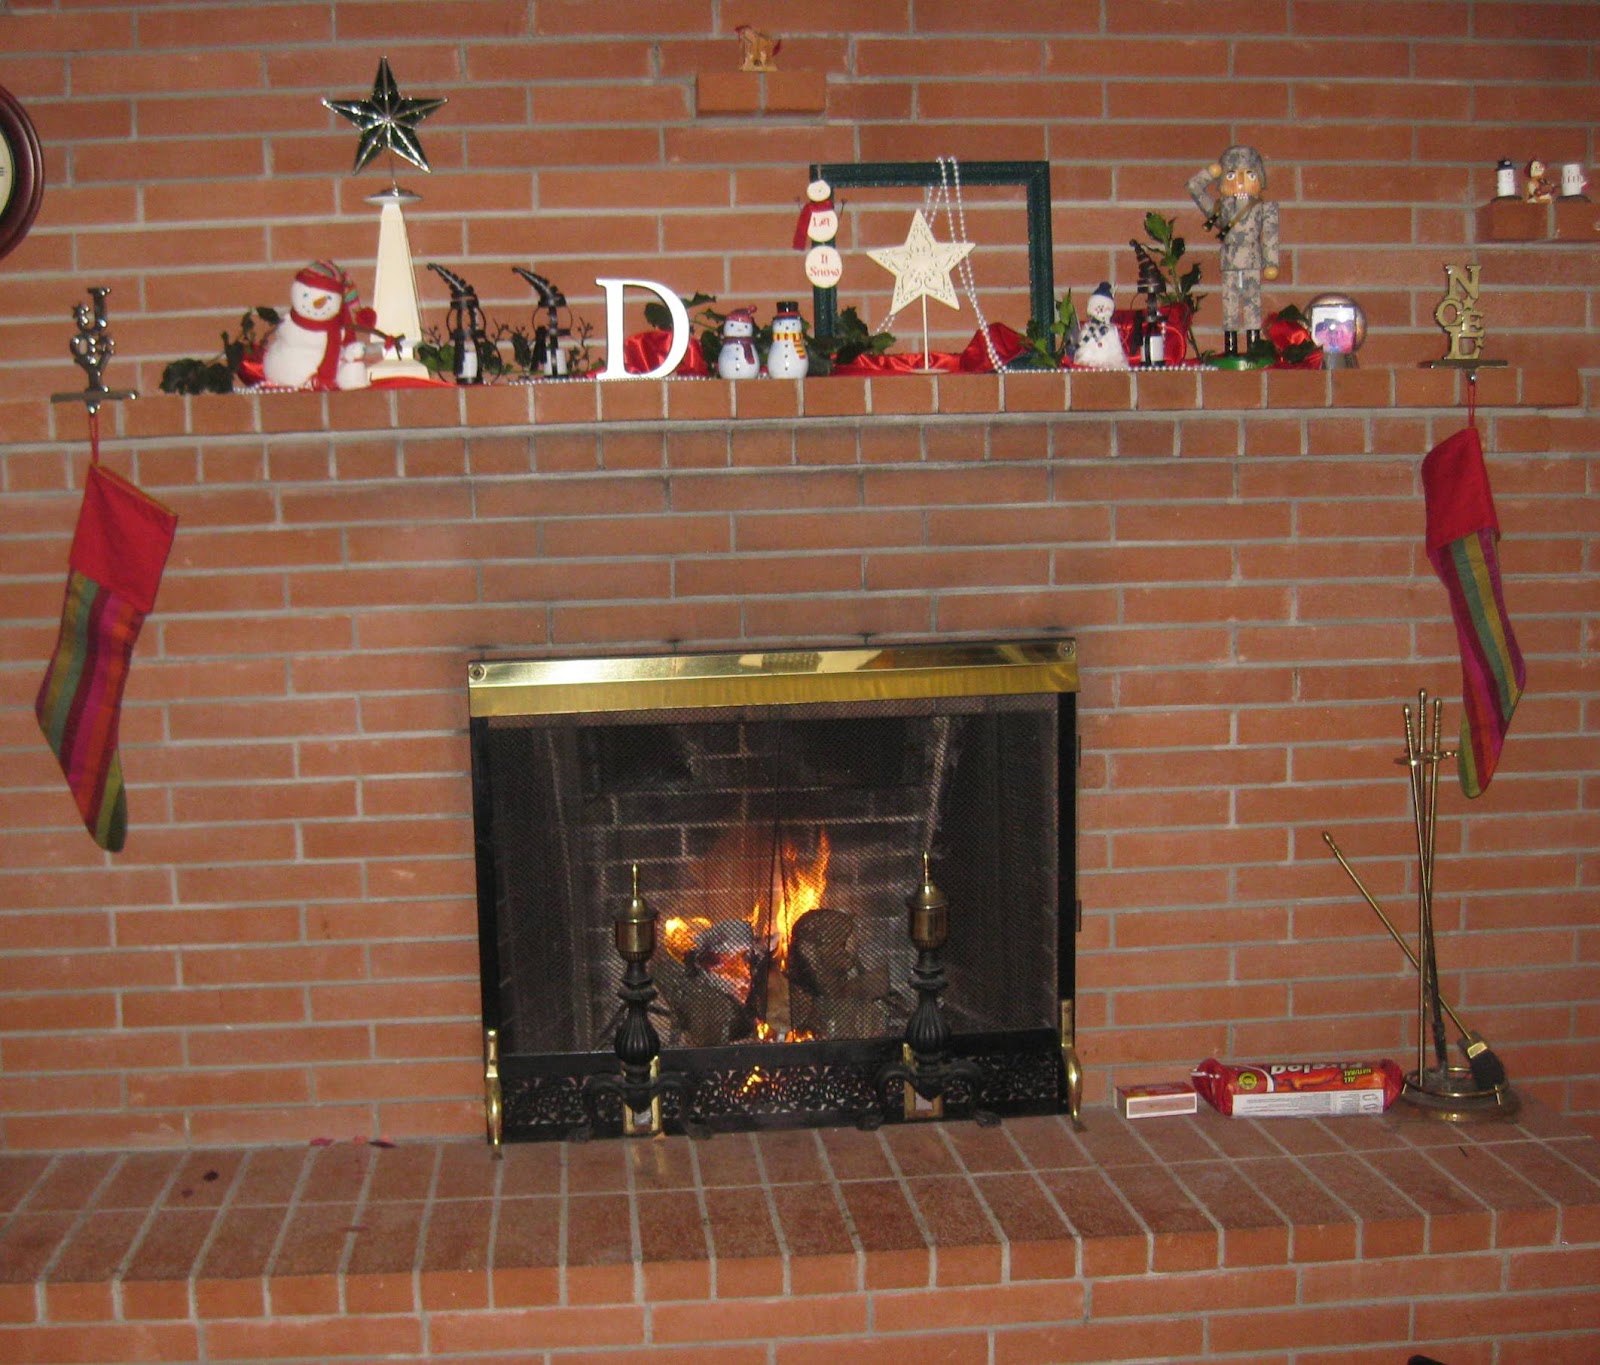
Remember my cheap-o Target star and spray painting project? Love it. Oh, and those 2 ceramic snowmen are salt and pepper shakers some gals and I painted at my bachelorette party.


Saturday, December 17, 2011
Christmas Craft: 5 minute Wreath (Ok, 15)
Every year, I see a wreath or Christmas craft idea but it is usually too late. Like last year, I made the ornament wreath, which apparently didn't make the blog but was those fragile circle ornaments hot glued to a hanger. That was fun, but a lot of glue, and very fragile results. So 2 years ago I purchased the ornaments at 90% off, so at least the idea only cost around $3 to make. I trashed it when the season was over.
Then last year I saw this other idea, making a wreath out of cookie cutters. But I already had my other ornamet wreath! Dilemmas. After Christmas I found these again for some ridiculous clearance and boxed them away for this year.
Enter: 5 minute wreath (That really took much longer.)
First of all, take off the price tags right away. Mine were very stuck after a year in the garage. I tried soaking the cutters in water, which just made them rusty. So I settled for carefully arranging them such that the price tags didn't show.

Then I glued. And it was finished.
And I decided that I actually DIDN'T want to see those price tags, so I spray painted it red.

*Instant love*

In hindsight, it would have been cool to paint these both red and green before glueing them. The wreath isn't perfect - you can still see the price tags through the paint if you look hard enough - so this wreath is out on the front door where hopefully the lighting will be bad enough no one will notice. The wreath itself is a little thin...not sure how I could have made that better except to jumble the cutters all over, but, then you can't see the shapes.

So what's the verdict...for the $5 that this cost, should I store it a year in the garage, or toss it and hope for new inspiration by December 2012???
Friday, December 9, 2011
Eggs and Noodles: Family Recipe
The meal entitled "Eggs and Noodles" is a Davenport traditional meal. Actually originally a Doscher meal, invented by Zach's grandfather, Poppi. The original recipe included....wait for it...EGGS, and NOODLES. (And butter.)
In our neck of the woods, we make this recipe in our usual manner: add everything from the fridge. Here in a large skillet, we browned mushrooms, zuchinni, carrots (hey, they were already chopped up), peppers, onions, and corn. To this we added some leftover cooked bacon and a chicken strip. Then we let it wait in a bowl so we could re-use the skillet. This is probably around 3 cups of cooked veggies.


Subscribe to:
Posts (Atom)


